Friday, March 25, 2011

Acid Bath and the Wooly Mammoth

I wanted to figure out a good way to clean up all the brass and copper tubing in an efficient manner that wasn't too corrosive, and would be food-safe-friendly. No one wants to taste Brasso in their Doppio Con Panna (double espresso with whipped cream). I checked the wonderful world wide web and perused the forums of coffeesnob.com.au, coffeegeek.com, and Home-Barista.com to see what was suggested.

The answer, Citric Acid. I think the suggested solution was 2-4 tablespoons of citric acid to one gallon of water. I started surfing Amazon and Ebay for sources after striking out in the local health food stores, and couldn't seem to find anything larger than small containers of 8-12 ounces which cost around $8, and then $4-5 shipping. Then I struck gold on Ebay. $25 for 5 pounds of citric acid. Yeah, it was a little overkill, but that $25 included shipping, and who knew what else I might want to descale in the future. Maybe steam punk would emerge into the mainstream, and I would be the man to polish Jules Verne's time machine. Either way, I may have ended up on a government watch list, or at least a bath-bomb sewing circle for ordering that much in bulk.

I used the top of a large Rubbermaid storage bin and warmed up a gallon pot of water on the stove as heat speeds up the reaction of the acid solution with the metal. I didn't heat all the water, but just enough to raise the temp to around 120 degrees in the container which was already half full with a gallon of cold water. I dissolved about 4-8 tablespoons of citric acid (looks like table salt) into the water and then added the tubing. The reaction was almost instantaneous. The copper started brightening up and losing its dull brown, turning almost pink. The brass started shining through the grime as it fell away. It was pretty amazing. I let it soak for a good 20-30 minutes, occasionally arranging the odd shaped tubing so that it would all get exposed. The soak also broke up most of the mineral deposits inside the tubes. I took all the tubing out rinsing it the best I could, and set it out to dry on a towel on my workbench. I picked up a couple of small pieces and tried some very fine steel wool on it. The shine it brought out was brilliant!

Over the course of the next couple of months when I had a half hour or more to spare, I would sneak down to the garage and shine up the tubing with steel wool. I cleaned it meticulously to the point of shining all 6 sides of each brass nut as well as the top and bottom. There are shiny parts on this machine that will probably never see the light of day again, but I know they're in there.


After finishing up with the brass and copper parts, I decided to clean up the stainless steel back plate and the two stainless steel shims the drip tray is supported from. Again, from the wisdom of the forums, I learned that citric acid is bad for ferrous metals and that the micro-abrasive qualities in car polish would work wonders... unless I wanted to spend the money to have the plates shined professionally by a fabrication shop. (I didn't). While not all the scratches came out, I was able to get the haze removed from the stainless and it looked good enough for my tastes.

I gave the boiler the same citric acid soak treatment as the tubing and used a brass brush to scrub it the best I could. I wanted to really sand it smooth and give it a near mirror finish, but the welds around the connections and seams would not have supported that level of detail and to grind them smooth might reduce the integrity of the boiler. Who wants to have 17 liters of scalding hot water and steam under 15 bars (atmospheres) of pressure explode due to manic cosmetic attention to detail? Not me. I got it clean and confirmed there wasn't any scale inside the boiler which was surprisingly clean. I thought that 5 years of having water sloshing around inside would have been more damaging, but it held up wonderfully.
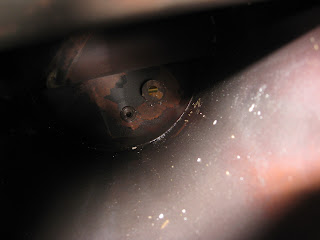


Now I had a bigger fish to fry before I could start reconstructing. THE GROUP HEADS OF DEATH! I had to get these cleaned up and the fossilized gaskets out before putting much of anything else back onto the frame. But I'll save that for the next post.
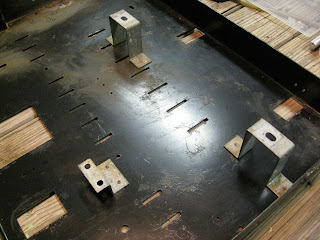
Frame the shot

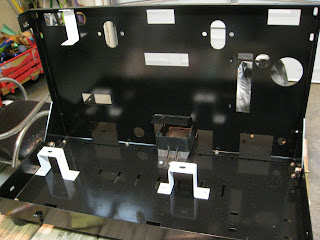
After a rather quick dis-assembly, I ended up with a pile of copper tubing, a box of electrical cables and wiring harnesses, and a dirty frame with a few rust spots on it. I had a box of high gloss black spray paint and grey primer from another "find" I never got around to refinishing. The boiler mounts and electric cable mounts were still riveted to the frame, so I drilled those out to replace with some screws and bolts I picked up for the task.

Before painting, I wanted at the very least to sand down the rust spots to the bare metal to prevent the paint from bubbling. I used 120 grit to start with and worked down to 400. I used the water hose and a brush to scrub the grime and bug crust off the rest and gave it plenty of time to dry. As I was doing this in the winter and the garage wasn't heated, I would put the frame inside to warm up, then take it out and put a coat of primer on, let it dry, and then bring it back inside to warm up again before the next coat. I did the same with the paint. In hindsight, I should have spent more time with prep work and sanded between the primer and paint coats, but considering every bit of the frame would be covered, there was little need for a car show paint job.

I cleaned up the galvanized boiler mounts and other mounts and scrubbed them clean with a brass brush and gave them a good rinse and dry. I spray painted them white just to give it a little more dressed up look when the machine was open, but unfortunately couldn't remove the mount from the pressure switch, so I left it as it was and just cleaned up the grime. Happy to have something clean and restored, I found the hardware for the frame I had labeled and set aside in bags and put it back together. I screwed the big rubber adjustable feet on the bottom and got things leveled up. I also attached the white mounts with the screws and bolts and attached the plastic drain box. Now I had a foundation to build the machine back onto.

Wednesday, March 23, 2011

Always Dive in Head First


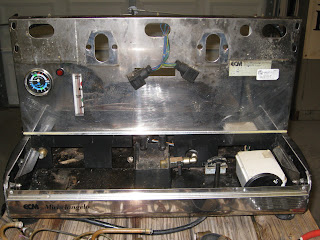
When I first brought the machine home, I took the cup warmer tray off the top and looked down inside with very little idea what anything was aside from the obvious boiler, and what specifically I needed to do to get the boiler out to drain the water. Now that I was ready to "do this thing," I located the few screws that held the rear panel on the machine and removed them exposing all the tasty contents of 5 years of abandonment.

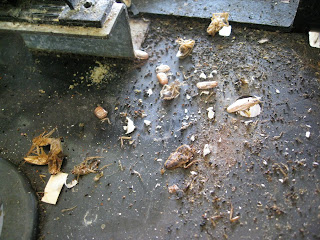
The accumulation of steam and condensation served as an oily glue which trapped any dirt, dust, spilled coffee, or grime that might have been floating around in the restaurant. I saw a few Sweet n' Low packets which I thought might have been accidentally dropped into the top of the cup tray until I realized that they were arranged in a nest. A mouse nest, replete with droppings. Mice weren't the only inhabitants as several insect carcasses were found near the power switch unit, which I guess warmed up and made a nice place to live while it was in operation. It was becoming very apparent that this machine was going to need a good cleaning. Even though none of what I could see so far touched the final espresso product, I just couldn't make coffee with a machine I knew was full of mouse turds.
Add Image

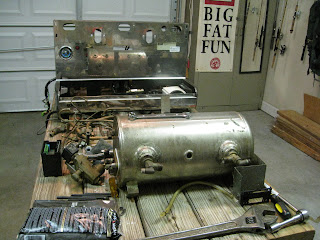
Armed with a Canon Powershot 850SD IS digital camera and an assortment of wrenches, I started removing the copper tubing, wiring, and connections inside. I made sure to take photos of the broad area and macro shots of the individual connections so I would have a reference for reassembly. In no time at all, I had the motor, pump, and boiler out and sitting on the work bench accompanied by a pile of copper tubing. All that was left was the frame, the boiler water level gauge, pressure gauge, and wiring connections.


I had about enough for one evening, and with the boiler removed, I did manage to slosh a bit of water out of it. However, at this point I knew I wasn't just going to put it back together. It needed some TLC to restore its former glory, but I had to figure out just how to do that.